Bluetooth Beacons for Location

It’s not uncommon for architects and interior designers to get on us wireless guys for cluttering up their aesthetic, so I always try to get on their good side whenever possible. They don’t tend to complain about “necessary” stuff like light switches and fire alarms, but for some reason, they never see network infrastructure as “necessary”.

I’m going to lay out a technical explanation about why we place BLE beacons where we do, while trying to be sensitive to the aesthetic considerations. (See also: Hiding In Plain Sight). Aruba’s best practices for beacon deployment are documented here: Location Beacon Deployment Guide – Meridian Platform Documentation (meridianapps.com)

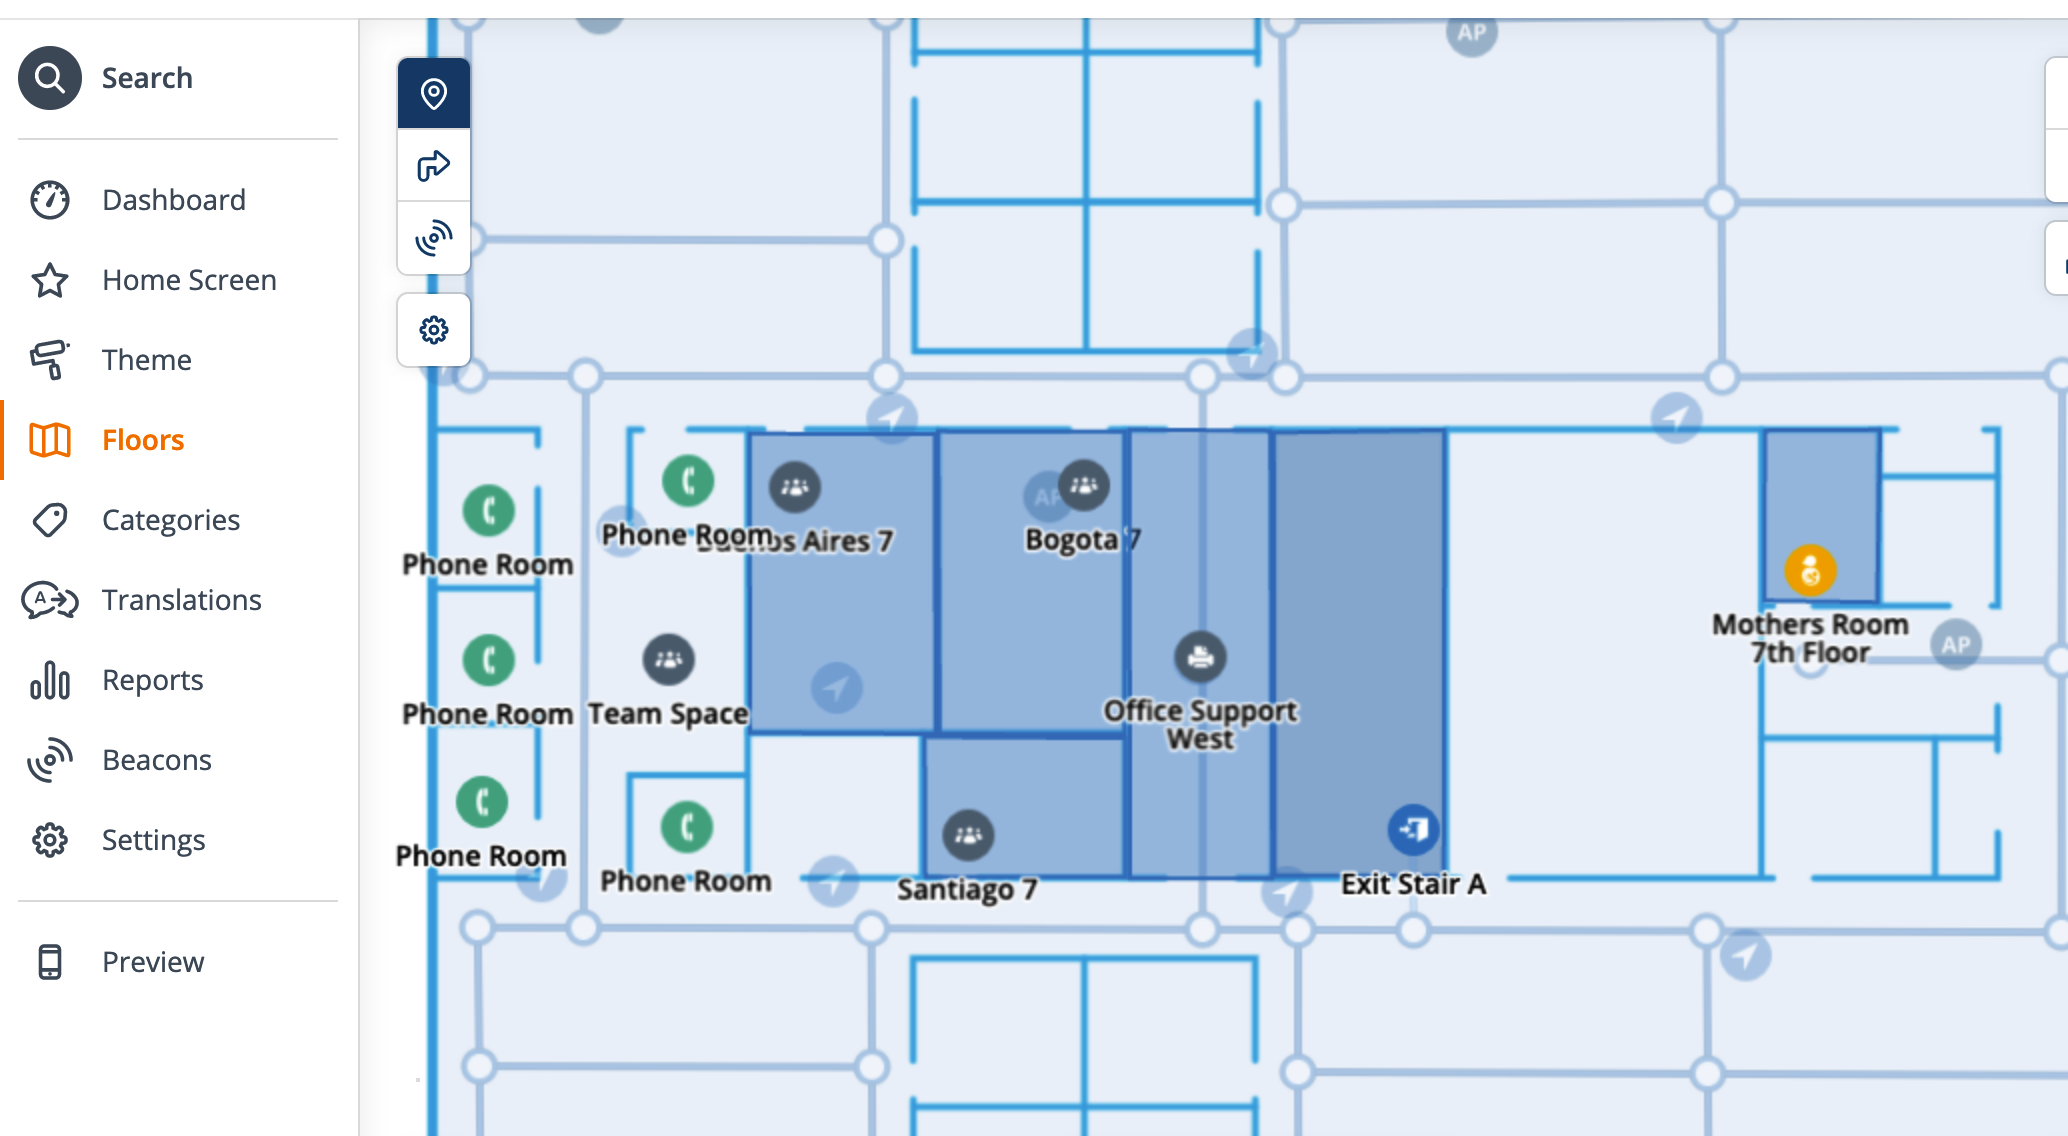
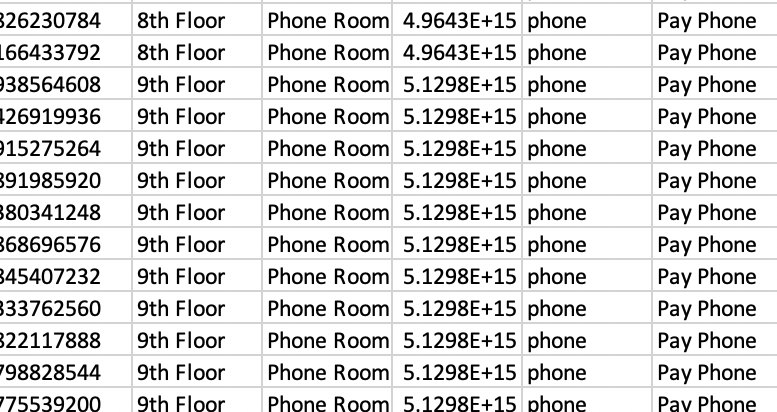
  1. Near The Floor. Sometimes, the wall finish is such that using adhesives or screws is practically a capital offense. It could be fabric, glass, metal, or whatever. At that point, you’ll usually have a baseboard upon which to mount them, just make sure it’s not going to get damaged by floor cleaning processes. Another reason to go close to the floor is to use the floor to create a shadow when deploying near an open hole like an atrium or a stairwell. You don’t generally want your beacons from one floor being visible on another, as that can really confuse a map that is not aware of floor holes. It’s also important to always place a beacon near every “portal” at each floor (doors from stairwells, elevator lobbies, and so forth) so the app knows when you’ve changed floors and to switch maps when navigating.
  2. On The Wall. I’ll explain in a minute why you want your beacons as close to the user as possible. What this generally means is that you want to go on the wall most of the time. In terms of spacing, you should generally be within 3-4m of a beacon anywhere in the building. Being closer to your beacons will improve accuracy, and greater beacon density will reduce latency (but only to a point, it typically takes 2-5 seconds for the app to get a new fix because it has to listen for all the beacons it can hear) .
  3. On The Ceiling. Suboptimal, but works in a pinch. Suboptimal mainly because even standing directly under the beacon, you’re usually at least 2m away from it.

Now for the engineering reasons behind all this: It all comes back to the old friend that wireless engineers everywhere love and cherish: free space path loss. Except here, we’re making constructive use of it.

Determining distance based on triangulation of beacon RSSI is optimal within about 0-4 metres due to the inverse square law of RF propagation. Typically, the calibrated output of the beacons is 0dBm (1mW). They operate in the 2.4GHz band on a 2MHz advertisement channel tucked between Wi-Fi channels 1 and 6, as well as one just past channel 11, and another one just below channel 1. My colleague Joel Crane explained BLE frequencies in 60 seconds (when he was at Mist, now he’s at Hamina after a brief stint back at Metageek)

There’s also some variability between receiver devices in terms of their sensitivity and even based on internal antenna configuration and how the device is held/oriented, so let’s just assume it’s +/- 3dB for the purposes of this example because it makes the math simpler.

Free Space Path Loss, Illustrated by my good friend and colleague François at Semfio Networks

When the receiving device sees a BLE beacon, it then determines its distance from that beacon based on the RSSI (and uses the beacon’s ID to correlate it with the device’s placement on the map). When it sees a beacon at -35dBm, it knows it’s under a metre away. If it sees it at -55dBm, that could be anywhere between 4 and 8 metres away. So the farther you get from the beacon, the wider that margin of error becomes. Any walls that get between can also add 3dB or more of attenuation depending on the materials used. (just like they do with Wi-Fi, since we’re dealing with the same RF frequencies, just at about 1/1000 the power).

Below 1 metre, every time you halve the distance you gain 6dB – so 50cm would be -34dB, 25cm would be -28dB, 12.5cm would be -22dB, and now we’re getting really close to the beacon, and it’s already lost 99% of the transmitted power… Also worth noting here that when you mount them on a metal surface, you gain a little bit back, but if your surface is less than one wavelength (~12cm) wide, the math gets tricky and I won’t go into it here.

What this means for placement is that you want to get them as close to the receiver as possible, usually within 4m. This generally means at a height of 1-2m on walls, and between 40 and 55 inches is ideal, since it avoids hips, shoulders, and carts which could damage the beacon or outright rip it off the wall (and collisions with a hip or shoulder is not fun for the owner of the hips and shoulders either… ask me how I know). They can also be placed on ceilings, but as I pointed out previously, in an office building, that usually means you’re never going to get closer than ~2m to the beacon even if you’re standing directly underneath it.  Beacons near the floor are about a meter closer to the receiving device than the ceiling would.

In a recent deployment, the basic beacon grid (best practice: 10m) was deployed on the structural column wraps, which were spaced about 12m apart. The gaps in the middle of the squares formed by 4 columns were filled in with AP based beacons (which isn’t always dead center due to some variability in the AP placement within those squares). In the common central areas on each floor, we had to fill some of those gaps with additional beacons to get within about 4-5m and provide greater accuracy due to the various obstructions, as well as place beacons near the areas where traffic enters and exits those spaces. 

In locations where there are particular aesthetic concerns, it is usually possible to paint the beacons and their mounts to match, as long as the paint does not contain any metallic materials (lead, aluminum powder, gold leaf, iron oxide, etc.), or you can apply a vinyl skin. This also applies to access points. Check with your vendor to make sure it will not void the warranty (as it tends to do with many vendors). You can also often find snap-on paintable covers for indoor APs if you don’t want to paint them directly. 

Applying this to design methodologies

So how do you plan out a beacon deployment? Same way you generally would with any RF planning. Ekahau supports modeling BLE access points (although it cannot survey them, much to my annoyance). At this point you want to set your BLE coverage requirements to the RSSI required for the most distance you want to be from the beacon, which is -52dBm, and you want to make sure that within that coverage level, you can always hear at least 3 beacons.

How it works with clients

(added July 2022)

How Bluetooth beacons work with clients is the subject of a lot of confusion on the part of the end users, especially those who are concerned about tracking, especially with the rise of Apple’s AirTags (more on those in a minute) and other personal item trackers.

The good news is that a BLE beacon is nothing more than a small circuit that blips out a small identifier at regular intervals (Aruba beacons do so every second). It has no idea where either it or you are. Generally speaking, the payload of the beacon is very small, consisting of a major ID and a minor ID. Other ancillary data can go in there as well.

BLE Beacon Frame Format (source: Mokoblue.com)

The Major ID generally identifies the beacon type, and the Minor ID identifies the individual beacon. If you open up a BLE sniffer, you’re surrounded by beacons almost everywhere you go. Your smartphone sees all of them, but if it had to look up what every single one does, it would nuke your battery in very short order. So what happens is that when you install an application that makes use of beacons, it tells the OS (IOS or Android or whatever) that it wants to know about any beacons with a certain Major ID. The OS then asks the user if they want to allow the app to receive data about nearby network devices (IOS, I don’t know offhand how Android does it).

Once the app has permission, any time the OS sees a Major ID that has been registered by an app, it will send that beacon info to the app, which then processes the data. Apps like Meridian that do location then have information from the back end that tells it where each beacon is located, and from that, based on the signal strength of the beacon, it can multilaterate the user’s location. Waze uses this approach to provide additional location in satellite-weak areas like tunnels. But anyone with an app that knows what to do with a particular beacon can benefit from it.

Which brings me to how Apple AirTags work. Apple has done a really good job of creating an asset tracking solution that ensures the tag owner’s privacy. An AirTag is still just a BLE beacon (with some extra stuff), and the Find My app has registered the Major IDs with the OS (from the factory – and it doesn’t have any special access to the OS). Where AirTag got really clever, is the Minor ID/payload is the owner’s public key (which is unique to that specific tag). This keypair is generated when the tag is activated If it’s detected by someone other than the owner, that device takes its location (from whatever source the OS location services has), the signal strength, and the time, and encrypts that using the public key, and uploads it to Apple’s servers. Only the owner of the tag who has the private half of that key pair (stored in the device’s TPM) can decrypt the payload. And if a particular device sees someone else’s tag with a constant signal strength as the device moves around, after a while (an hour or two) it will determine that someone may be using a tag to track you and warns you. A few months ago, my daughter went on a school band trip and borrowed my suitcase, which still had an AirTag buried in it from a recent trip to Europe. About halfway across Iowa, almost 100 kids in three separate buses (including my daughter) simultaneously got an alert on their iPhones that an AirTag might be following them. They all found this incredibly amusing.

Tile’s product works in a very similar manner, but I don’t know if it does the encryption thing (which is likely patented by Apple). Apple’s product benefits from a much broader client detection base due to Find My being installed on every iPhone, so anyone with an iPhone can see and handle an AirTag. Handling a Tile beacon requires the Tile app to be installed (and some bluetooth devices like headphones are able to be located with Tile), which limits the reach. As far as I know, there’s nothing that would prevent Tile from adopting the Find My device spec. There have also been some Proof-of-Concept deployments where BLE-capable infrastructure such as Aruba Wi-Fi can also report these types of beacons back to their respective service providers.

Location, Location, Location, Part Deux

Yesterday, I posted about leveraging the Meridian API to get a list of placemarks into a CSV file. Today, We’ll take that one step further, and go the other way – because bulk creating/updating placemarks is no fun by hand.

For instance, in this project, I created a bunch of placemarks called “Phone Room” (didn’t know what else to call them at the time). There were several of these on multiple floors. To rename them in the Meridian Editor, I would have to click on each one, rename it, and save.

So, once I got guidance on what they were to be called, I fired up Excel and opened up the CSV that I created yesterday, and made the changes in bulk, and then ran them back into Meridian the other way – I changed the name, the type, and the icon:

Sounds easy, right?

Not so much. I ran into some trouble when I opened it in excel, and all my map IDs looked like this:

This is because Excel is stupid, but trying to be smart. It sees those as Really Big Numbers, and converts them to scientific notation, because the largest it can store is a 15-digit integer. And of course, these map IDs are… 16 digits. But I can’t just convert them back as integer number formatting because it then takes the first 15 digits and adds a zero. This, of course, breaks the whole thing. Excel will also do some similar shenanigans when parsing interface names from AOS or Cisco that look like “2/1/4”, which excel assumes is a date, because excel assumes everything that looks vaguely numeric must be a number, because it is a spreadsheet after all, and spreadsheets are made for numbers, even if people abuse them all the time as a poor substitute for a database.

So, this means you either have to make the changes directly in the CSV with a text editor, or find another sheets application that doesn’t mangle the map IDs. Fortunately, for us Mac users, Apple’s spreadsheet application (“Numbers”) handles this just fine. So make the changes, export to CSV, and run it all back into the API. (you can also name it as a .txt and manually import into Excel and specify that as a text column, but that’s tedious, which is what we’re trying to avoid)

I’ve built a bit of smarts into this script, since I don’t want to break things on Meridian’s end (although Meridian does a great job of sanity checking and sanitizing the input data from the API). The first thing it does is grab a list of available maps for the location. Then it goes through all the lines in the spreadsheet, converts them to the JSON payload that Meridian wants, and checks to see if there’s existing data in the id field. If there is, it assumes that this is an update (it does not, however, check to see if the data already matches the existing placemark since Meridian does that already when you update). If there is no ID, it assumes that this is a new object to be created, and verifies that it has the minimum required information (name, map, and x/y position), and in both cases, checks to make sure the map data in the object is a map ID that exists at this location (this is how I found out that excel was mangling them)

Running the script spits out this for each row in the CSV that it considers an update:

Update object id XXXXXXXXXXXXXXX_5666694473318400
object update passed initial sanity checks and will be placed on 11th Floor.
Updating existing object with payload:
{
  "id": "XXXXXXXXXXXXXXX_5666694473318400",
  "name": "Huddle Space",
  "map": "XXXXXXXXXXXXXXX",
  "type": "conference_room",
  "type_name": "Conference Room",
  "color": "f2af1d",
  "x": "177.20516072322900",
  "y": "597.6184874989240",
  "latitude": 41.94822,
  "longitude": -87.65552,
  "area": "",
  "description": "",
  "phone": "",
  "email": "",
  "url": ""
}
Object ID XXXXXXXXXXXXXXX_5666694473318400 named Huddle Space updated on map XXXXXXXXXXXXXXXX

If it doesn’t find an id and determines that an object needs to be created, it goes down like this:

Create new object: 
object create passed initial sanity checks and will be placed on 11th Floor.
Creating new object with payload:
{
  "name": "Test Placemark",
  "map": "XXXXXXXXXXXXXXXX",
  "type": "generic",
  "type_name": "Placemark",
  "color": "f2af1d",
  "x": "400",
  "y": "600",
  "latitude": "",
  "longitude": "",
  "area": "",
  "description": "",
  "phone": "",
  "email": "",
  "url": "https://arubanetworks.,com"
}
Object not created. Errors are
{
  "url": [
    "Enter a valid URL."
  ]
}

As you can see here, I made a typo in the URL field, and the data returned from the API call lists the fields that contain an error. If the call is successful, it returns an ID, which the script checks for to verify success. The response from a successful API call looks like this :

{
  "parent_pane": "",
  "child_pane_ne": "",
  "child_pane_se": "",
  "child_pane_sw": "",
  "child_pane_nw": "",
  "left": -1,
  "top": -1,
  "width": -1,
  "height": -1,
  "next_pane": null,
  "next_id": "5484974943895552",
  "modified": "2021-08-11T15:12:52",
  "created": "2021-08-11T15:12:52",
  "id": "XXXXXXXXXXXXXXXX_5484974943895552",
  "map": "XXXXXXXXXXXXXXXX",
  "x": 400.0,
  "y": 600.0,
  "latitude": 41.94822,
  "longitude": -87.65552,
  "related_map": "",
  "name": "Test Placemark",
  "area": null,
  "hint": null,
  "uid": null,
  "links": [],
  "type": "generic",
  "type_category": "Markers",
  "type_name": "Placemark",
  "color": "88689e",
  "description": "",
  "keywords": null,
  "phone": "",
  "email": "",
  "url": "https://arubanetworks.com",
  "custom_1": null,
  "custom_2": null,
  "custom_3": null,
  "custom_4": null,
  "image_url": null,
  "image_layout": "widescreen",
  "is_facility": false,
  "hide_on_map": false,
  "landmark": false,
  "feed": "",
  "deep_link": "com.arubanetworks.aruba-meridian://ZZZZZZZZZZZZZZZZ/placemarks/XXXXXXXXXXXXXXXX_5484974943895552",
  "is_disabled": false,
  "category_ids": [],
  "categories": []
}

Of course, the script doesn’t have to spit out all that output, but it’s handy to follow what’s going on. Comment out the print lines if you want it to shut up.

So, without further ado, here’s the script. This has not been debugged extensively, so use at your own risk. If you break your environment, you probably should have tested it in the lab first.

#!/usr/bin/python3

# Aruba Meridian Placemark Import from CSV
# (c) 2021 Ian Beyer
# This code is not endorsed or supported by HPE

import json
import requests
import csv
import sys

auth_token = '<please insert a token to continue>'
location_id = 'XXXXXXXXXXXXXXXX'

baseurl = 'https://edit.meridianapps.com/api/locations/'+location_id


header_base = {'Authorization': 'Token '+auth_token}

def api_call(method,endpoint,headers,payload):
	response = requests.request(method, baseurl+endpoint, headers=headers, data=payload)
	resp_json = json.loads(response.text)
	return(resp_json)

#File name argument #1
try:
	fileName = str(sys.argv[1])
except:
	print("Exception: Enter file to use")
	exit()


# Get available maps for this location for sanity check
maps={}

# print("Available Maps: ")
for floor in api_call('GET','/maps',header_base,{})['results']:
 	maps[floor['id']] = floor['name']
# 	print (floor['name']+ ": "+ floor['id'])


import_data_file = open(fileName, 'rt')

csv_reader = csv.reader(import_data_file)
count = 0

objects = []

csv_fields = []

for line in csv_reader:
	placemark = {}

	# Check to see if this is the header row and capture field names
	if count < 1 :
		csv_fields = line
	else:
		# If this is a data row, capture the fields and put them into a dict object
		fcount = 0
		for fields in line:
			objkey = csv_fields[fcount]
			placemark[objkey] = line[fcount]
			fcount += 1

		# Add the placemark object into the object list
		objects.append(placemark)		
	count +=1

#print(json.dumps(objects, indent=2))

import_data_file.close()

#Check imported objects for create or update. If it has an ID, then update. 
for pm in objects:
	task = 'ignore'
	if pm['id'] == "" :
		task = 'create'
		print("Create new object: ")
		# Delete id from payload
		del pm['id']
	else:
		task = 'update'
		print("Update object id "+ pm['id'])


	# Remove floor from payload as it is not valid
	del pm['floor']

	# Check to see if the basics are there before making the API calls
	reject = []
	if pm['x'] == "":
		reject.append("Missing X coordinate")
	if pm['y'] == "":
		reject.append("Missing Y coordinate")
	if pm['map'] == "":
		reject.append("Missing map id")
	if pm['name'] == "":
		reject.append("Missing object name")

	if len(reject)>0:
		#print("object "+ task + " rejected due to missing required data:")
		for reason in reject:
			print(reason)
		task = 'ignore'
	else:
		if maps.get(pm['map']) == None:
			print ("Map ID "+pm['map']+" Not found in available maps. Object will not be created. ")
			task = 'ignore'
		else:
			print("object "+ task + " passed initial sanity checks and will be placed on "+ maps[pm['map']] +".")


	#print ("Object Payload:")	
	#print (json.dumps(pm, indent=2))

	method = 'GET'
	
	if task == 'create':
		#print ("Creating new object with payload:")	
		#print (json.dumps(pm, indent=2))
		method = 'POST'
		ep = '/placemarks'
		result = api_call(method,ep,header_base,pm)

		if result.get('id') != None:
			print ("Object ID "+result['id']+" named "+result['name']+ " created on map "+ result['map'])
		else:
			print ("Object not created. Errors are")
			print (json.dumps(result, indent=2))
	if task == 'update':
		#print ("Updating existing object with payload:")	
		#print (json.dumps(pm, indent=2))
		method = 'PATCH'
		ep = '/placemarks/'+pm['id']
		result = api_call(method,ep,header_base,pm)

		if result.get('id') != None:
			print ("Object ID "+result['id']+" named "+result['name']+ " updated on map "+ result['map'])
		else:
			print ("Object not updated. Errors are")
			print (json.dumps(result, indent=2))


baseurl = 'https://edit.meridianapps.com/api/locations/'+location_id


header_base = {'Authorization': 'Token '+auth_token}

def api_call(method,endpoint,headers,payload):
	response = requests.request(method, baseurl+endpoint, headers=headers, data=payload)
	resp_json = json.loads(response.text)
	return(resp_json)


# Get available maps for this location for sanity check
maps={}

# print("Available Maps: ")
for floor in api_call('GET','/maps',header_base,{})['results']:
 	maps[floor['id']] = floor['name']
# 	print (floor['name']+ ": "+ floor['id'])


# I've hard coded the file name here because I'm lazy. 

import_data_file = open('placemarks_update.csv', 'rt')

csv_reader = csv.reader(import_data_file)
count = 0

objects = []

csv_fields = []

for line in csv_reader:
	placemark = {}

	# Check to see if this is the header row and capture field names
	if count < 1 :
		csv_fields = line
	else:
		# If this is a data row, capture the fields and put them into a dict object
		fcount = 0
		for fields in line:
			objkey = csv_fields[fcount]
			placemark[objkey] = line[fcount]
			fcount += 1

		# Add the placemark object into the object list
		objects.append(placemark)		
	count +=1

#print(json.dumps(objects, indent=2))

import_data_file.close()

#Check imported objects for create or update. If it has an ID, then update. 
for pm in objects:
	task = 'ignore'
	if pm['id'] == "" :
		task = 'create'
		print("Create new object: ")
		# Delete id from payload
		del pm['id']
	else:
		task = 'update'
		print("Update object id "+ pm['id'])


	# Remove floor from payload as it is not valid
	del pm['floor']

	# Check to see if the basics are there before making the API calls
	reject = []
	if pm['x'] == "":
		reject.append("Missing X coordinate")
	if pm['y'] == "":
		reject.append("Missing Y coordinate")
	if pm['map'] == "":
		reject.append("Missing map id")
	if pm['name'] == "":
		reject.append("Missing object name")

	if len(reject)>0:
		#print("object "+ task + " rejected due to missing required data:")
		for reason in reject:
			print(reason)
		task = 'ignore'
	else:
		if maps.get(pm['map']) == None:
			print ("Map ID "+pm['map']+" Not found in available maps. Object will not be created. ")
			task = 'ignore'
		else:
			print("object "+ task + " passed initial sanity checks and will be placed on "+ maps[pm['map']] +".")


	#print ("Object Payload:")	
	#print (json.dumps(pm, indent=2))

	method = 'GET'
	
	if task == 'create':
		#print ("Creating new object with payload:")	
		#print (json.dumps(pm, indent=2))
		method = 'POST'
		ep = '/placemarks'
		result = api_call(method,ep,header_base,pm)

		if result.get('id') != None:
			print ("Object ID "+result['id']+" named "+result['name']+ " created on map "+ result['map'])
		else:
			print ("Object not created. Errors are")
			print (json.dumps(result, indent=2))
	if task == 'update':
		#print ("Updating existing object with payload:")	
		#print (json.dumps(pm, indent=2))
		method = 'PATCH'
		ep = '/placemarks/'+pm['id']
		result = api_call(method,ep,header_base,pm)

		if result.get('id') != None:
			print ("Object ID "+result['id']+" named "+result['name']+ " updated on map "+ result['map'])
		else:
			print ("Object not updated. Errors are")
			print (json.dumps(result, indent=2))

It’s also worth noting here that the CSV structure and field order isn’t especially important since it reads in the header row to get the keys for the dict – as long as you have the minimum data (name/map/x/y) you can create a table of new objects from scratch. Any valid field can be used (although categories requires some additional structure)

Questions/comments/glaring errors? Comment section is right here. Scripts on this page can also be found on github.

Location, Location, Location

It seems fitting that the week in which I became the first to pass the CWIDP (Certified Wireless IoT Design Professional) certification would be one where I happened to be onsite doing a BLE location project with Aruba Meridian.

While the web based editor is great, it is mildly annoying that one of the things it can’t do is copy and paste placemarks between floors, which would be really handy when you’re deploying an office building that has almost the same layout on every floor. For this, you have to dig into the Meridian API.

By using the API, you can spit out a list of placemarks in JSON (easiest way to do this is in Postman, with a GET to {{BaseURL}}/locations/{{LocationID}}/placemarks), grab the JSON objects for the placemarks you wish to copy from the output, update the fields in the JSON for which map ID they need to go on, and any other data, and then make a POST back to the same endpoint with a payload containing the JSON list of objects you want to create. Presto, now you’ve been able to clone all the placemarks from one floor to another.

Note that point coordinates are relative to the map image – So cloning from one map to another can bite you in the rear if they’re not properly aligned. (If you want to get really clever, You could manually create a placemark on every floor whose sole purpose is to align each floor in code – much like an alignment point in Ekahau, when you generate a placemark list, you can calculate any offsets between them and apply those to coordinates before sending them back to the API. But this trick could (and probably will) be a whole post of its own.

The structure of a placemark object from a GET:

       {
            "parent_pane": "",
            "child_pane_ne": "",
            "child_pane_se": "",
            "child_pane_sw": "",
            "child_pane_nw": "",
            "left": -1,
            "top": -1,
            "width": -1,
            "height": -1,
            "next_pane": null,
            "next_id": "XXXXXXXXXXXXXXXXXX",
            "modified": "2021-08-06T22:57:29",
            "created": "2021-08-06T15:28:13",
            "id": "XXXXXXXXXX_XXXXXXXXXX",
            "map": "XXXXXXXXXXXXXXXX",
            "x": 2152.0189227788246,
            "y": 499.59448403469816,
            "latitude": 41.94822,
            "longitude": -87.65552,
            "related_map": "",
            "name": "Pitch Room",
            "area": "2132.722,480.101,2228.177,480.498,2230.003,634.737,2132.412,634.722",
            "hint": null,
            "uid": null,
            "links": [],
            "type": "conference_room",
            "type_category": "Office",
            "type_name": "Conference Room",
            "color": "596c7c",
            "description": null,
            "keywords": null,
            "phone": null,
            "email": null,
            "url": null,
            "custom_1": null,
            "custom_2": null,
            "custom_3": null,
            "custom_4": null,
            "image_url": null,
            "image_layout": "widescreen",
            "is_facility": false,
            "hide_on_map": false,
            "landmark": false,
            "feed": "",
            "deep_link": null,
            "is_disabled": false,
            "category_ids": [
                "XXXXXXXXXXXXXXXX"
            ],
            "categories": [
                {
                    "id": "XXXXXXXXXXXXXXXX",
                    "name": "Conference Room"
                }
            ]
        }

However, when creating a new placemark, you don’t need all these fields… The only objects that are absolutely required are map, type, x, and y (I haven’t tried sending an id along with a POST, so I don’t know if it will ignore it or reject it.) I’ve used Postman variables here for map and name, because then I could just change those in the environment variables and resubmit to put on multiple floors. The best part about the POST method is that the payload doesn’t just have to be a single JSON object, it can be a list of them, by simply putting multiple objects inside a list using square brackets.

{
            "map": "{{ActiveMapID}}",
            "x": 2152.0189227788246,
            "y": 499.59448403469816,
            "latitude": 41.94822,
            "longitude": -87.65552,
            "related_map": "",
            "name": "{{ActiveFloor}} Pitch Room",
            "area": "2132.722,480.101,2228.177,480.498,2230.003,634.737,2132.412,634.722",
            "hint": null,
            "uid": null,
            "links": [],
            "type": "conference_room",
            "type_category": "Office",
            "type_name": "Conference Room",
            "color": "596c7c",
            "description": null,
            "keywords": null,
            "phone": null,
            "email": null,
            "url": null,
            "custom_1": null,
            "custom_2": null,
            "custom_3": null,
            "custom_4": null,
            "image_url": null,
            "image_layout": "widescreen",
            "is_facility": false,
            "hide_on_map": false,
            "landmark": false,
            "feed": "",
            "deep_link": null,
            "is_disabled": false,
            "category_ids": [
                "5095323364098048"
            ],
            "categories": [
                {
                    "id": "5095323364098048",
                    "name": "Conference Room"
                }
            ]
        }

And if you want to update an existing placemark, simply make a PATCH call to the API with the existing placemark’s ID, and whatever fields you wish to update. Like with the POST call, you can send a payload that is a list of objects This is a great way to batch update URLS or names.

It may also come in handy to generate a list of all the placemarks at a given location. So I threw together a handy little python script that will spit it out into a CSV (and will also look up the map ID and get the floor number for easy reference).

#!/usr/bin/python3

# Aruba Meridian Placemark Export to CSV
# (c) 2021 Ian Beyer
# This code is not endorsed or supported by HPE

import json
import requests
import csv
import sys

auth_token = 'Please Insert Another Token to continue playing'
location_id = 'XXXXXXXXXXXXXXXX'

baseurl = 'https://edit.meridianapps.com/api/locations/'+location_id


header_base = {'Authorization': 'Token '+auth_token}

def api_get(endpoint,headers,payload):
	response = requests.request("GET", baseurl+endpoint, headers=headers, data=payload)
	resp_json = json.loads(response.text)
	return(resp_json)

#File name argument #1
try:
	fileName = str(sys.argv[1])
except:
	print("Exception: Enter file to use")
	exit()

maps={}

for floor in api_get('/maps',header_base,{})['results']:
	maps[floor['id']] = floor['name']

beacons=[]

# Iterate by floor for easy grouping - 
for flr in maps.keys():
	bcnlist=api_get('/beacons?map='+flr,header_base,{})
	# NOTE: If bcnlist['next'] is not null, then there are additional pages - this doesn't process those yet. 
	for bcn in bcnlist['results']:
		# Add floor name column for easier reading. 
		bcn['floor']=maps[bcn['map']]
		beacons.append(bcn)


data_file = open(fileName, 'w')
csv_writer = csv.writer(data_file)
count = 0

csv_fields = beacons[0].keys()

print(csv_fields)

csv_writer.writerow(csv_fields)

#print(placemarks)
for bcn in beacons:
	data=[]
	for col in csv_fields:
		data.append(bcn[col])
	# Writing data of CSV file
	csv_writer.writerow(data)
	count += 1
data_file.close()

print ("Exported "+str(count)+" beacons. ")

Once you have this list in a handy spreadsheet form, then you can make quick and easy edits, and then run the process the other way.

Scripts on this page can also be found on github.